
To enter Terminal Lucidity through the main Hallowed Concepts route, defeat both Anima Harvester phases in Soulbound Threshold, interact with the altar using Beseech the orb, then use Reincarnation near the central ritual pedestal. Interact with the resulting Veil of Memory to go beyond the veil. You do not need all six N'tormat pages to open this route.
The door interaction differs from the alternative sacrifice sites: the main door use kills nobody, while a qualifying sacrifice site kills players inside its circle and needs at least one N'tormat holder inside to transfer the team. Choose the route before activating Reincarnation.
Choose between the door and a sacrifice site
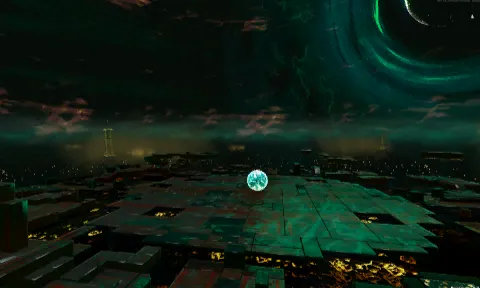
Terminal Lucidity is a hidden realm in Hallowed Concepts. The documented entrance routes all use Reincarnation at a qualifying location. Simply possessing the page or activating it at an arbitrary location does not establish access to this realm.
| Requirement | Soulbound Threshold door | Alternative sacrifice site |
|---|---|---|
| Preparation | Defeat both Anima Harvester phases and beseech the orb | Reach a qualifying site before completing Terminal Lucidity in this run |
| Reincarnation positioning | 18-meter zone around the central ritual pedestal | Location-specific detection zone plus a six-meter sacrifice circle |
| Players killed by this entrance | Nobody | Players inside the sacrifice circle |
| N'tormat holder inside the circle | Not required for this special door use | At least one is required for the transfer |
| Full collection of six pages | Not required | Not established as an entrance requirement |
The location's detection radius and the sacrifice circle are different measurements. The six-meter circle determines who is sacrificed and whether a book holder is present; a qualifying transfer then moves the team, rather than only the players standing in that circle.
Use the main Soulbound Threshold route
- Follow the Hallowed route to the Anima Harvester encounter in Soulbound Threshold.
- Defeat both phases. Do not treat the first phase's defeat as completion of the entire prerequisite.
- Interact with the altar and choose Beseech the orb.
- Move into the 18-meter zone around the central ritual pedestal and use Reincarnation. Then enter the Veil of Memory at the door.
- Interact with the Veil of Memory using Go beyond the veil.
This special use of Reincarnation opens the door without sacrificing anyone. It also does not require an N'tormat holder standing within the ordinary sacrifice circle. These exceptions belong to the door interaction; they should not be carried over to the alternative sites.
The Hallowed route planner covers the earlier route decisions. Use this page when the remaining question is how to cross into Terminal Lucidity, rather than repeating the entire progression from a fresh run.
Understand the page-collection hint
The complete N'tormat set except Clarity, counting consumed pages, can add an objective hint. That hint is not the entrance condition. Collecting every page before trying the door can therefore add an unnecessary detour.
Keep three things separate: having the Reincarnation page needed for the interaction, satisfying the route's location and encounter conditions, and triggering an optional hint through a broader page collection. Only the first two describe the documented entrance steps.
The N'tormat guide explains the book and its pages. Do not interpret a missing hint as proof that the realm is inaccessible when the actual door conditions have been met.
Use an alternative sacrifice site carefully
Alternative zones exist in variants of Bulwark's Ambry, Helminth Hatchery, Reformed Altar and Prime Meridian. These routes are available only before Terminal Lucidity has been completed during the current run. A completed realm cannot be reopened by repeating one of these sacrifices.
One documented Helminth Hatchery landmark is below the Wurm head, beside the table with the broken Providence sword. Reformed Altar has two qualifying zones. This guide does not provide a verified coordinate map for every variant, so the environment name alone should not be taken as permission to activate Reincarnation anywhere on that stage.
At a qualifying site, the Reincarnation circle has a six-meter radius and resolves after two seconds. Players within the circle are killed by the sacrifice. Revival items such as Dio's Best Friend do not trigger, but these deaths do not end the run. At least one N'tormat holder must be inside for the team transfer to happen; without that condition, the sacrifice can kill players without taking them to Terminal Lucidity.
Before activating, identify the qualifying landmark and make sure an N'tormat holder will be inside the circle. Other players do not all need to stand inside the lethal circle for the team transfer. Do not confuse being somewhere in the larger detection area with having the required book holder inside the actual circle. The available site-detection radii range from 18 to 76 meters, which is why these two boundaries are easy to confuse.
A successful transfer consumes Reincarnation and skips its next regeneration. That matters when planning additional page use later in the run. The Reincarnation guide covers the page's wider behavior; this entrance is a specific use with its own cost and positioning rules.
Prepare for a four-part encounter
Entering the realm starts a route with four encounter phases. Reaching Terminal Lucidity is not the same as completing it or earning its final rewards.
| Phase | Encounter |
|---|---|
| First | Echo of Providence (Fading Memory) |
| Second | Two Corroded Wurms |
| Third | Echo of Providence (Fallen Bulwark) |
| Fourth | Echo of Providence (Dying Wish), with permanent fog |
The fourth phase's permanent fog is part of the encounter rather than evidence that a return portal has been missed. Save detailed combat planning for the Echo of Providence guide, which owns the boss-fight topic.
For route planning, the important distinction is that the entrance, the four-phase fight and the reward selection are separate steps. Do not abandon the run after opening the veil on the assumption that the associated completion challenge has already been awarded.
Choose two items from Echoing Essence
Each player's Echoing Essence presents five items: one Legendary, two Hallowed and two Uncommon. You can select two. The available choices therefore matter more than a general promise of receiving every item shown.
Check the actual selection interface before choosing. The precise category restriction is not sufficiently established here to promise a particular combination of two rewards. This guide does not assume that every pair from the five offers is selectable.
A Primordial Teleporter follows the encounter. Use the interaction presented in the completed realm; do not plan around an unverified claim that it always bypasses a charge time.
Defeating the Echo of Providence increases Karma, counts toward the applicable survivor Memento Mori skin achievement, and disables the other sacrifice sites for the current run. If another player is still planning a shortcut through one of those sites, coordinate before completing the realm: its availability is tied to the run's completion state.
Check the associated skins and Environment Log
The realm is associated with these survivor skin challenges:
| Survivor | Skin |
|---|---|
| Bandit | Plagued |
| Engineer | Nautilus |
| Artificer | Andradite |
| REX | Indurate |
| Captain | Adrift |
| Acolyte | Vessel |
Select the relevant survivor and check the cosmetic challenge you are pursuing before committing to the route. The list identifies the associated skins; it is not a claim that one completion grants every listed cosmetic to every participant.
The Environment Log appears on a sword at the back left, beside the Commando ghost. It despawns 300 seconds after appearing. If collecting the log is one of your goals, account for that limited window while handling rewards and the exit.
Diagnose an entrance that did not work
- Only one Harvester phase was defeated: finish both before attempting the main door sequence.
- The altar interaction was skipped: beseech the orb before using the door route.
- You are waiting for all six pages: the complete collection is not required for this entrance.
- An alternative-site sacrifice killed players without transferring them: check that an N'tormat holder was inside the six-meter circle and that the activation was at a qualifying site.
- The realm was already completed this run: other sacrifice entrances are disabled for the remainder of that run.
Use the door route when you want to follow the explicit encounter-and-altar sequence. Use an alternative site only when its landmark and sacrifice conditions are clear. The two routes reach the same realm, but their death and player-positioning rules are materially different.