
The current item reference separates 20 passive Lunar items from five Lunar equipment options across the base game and expansions. Your enabled DLC and completed unlocks determine what can appear. Blue N'tormat Pages are a separate category, so a blue icon alone does not make every newer pickup a conventional Lunar item. Current item categories.
Buying Lunar items without wasting coins
Lunar Pods offer a random Lunar pickup. The Bazaar lets you inspect a small selection before spending, which makes it the more deliberate option when you want a particular effect.
- Activate a Newt Altar for 1 Lunar Coin, or use a naturally appearing Blue Portal.
- Complete the Teleporter event and enter the Blue Portal.
- Inspect the Bazaar's five Lunar Buds. Each available purchase costs 2 Lunar Coins; only items unlocked by someone in the run can appear.
- If you reroll the remaining stock, budget for a rising cost: 1, 2, 4, 8 Lunar Coins and onward. Purchased buds do not refill.
Entering through a Newt Altar and buying one bud therefore needs three coins before any reroll. A naturally spawned portal saves the altar cost. Time and difficulty pause inside the Bazaar, so read the choices before committing. Bazaar costs and stock rules.
Match the benefit to the downside
These are selection guidelines rather than a universal tier list. Read the downside column first if your run already works well.

Shaped Glass increases base damage at the cost of maximum health.
| Passive Lunar item | What it gives you | What you must accommodate |
|---|---|---|
| Shaped Glass | Doubles base damage on the first copy. | Halves maximum health; the extra damage comes with a much smaller survival margin. |
| Purity | Reduces skill cooldowns by a flat amount. | Adds unfavorable luck rolls to chance-based effects. |
| Gesture of the Drowned | Cuts equipment cooldown. | Automatically uses equipment as soon as it is ready, removing manual timing. |
| Focused Convergence | Speeds up Teleporter charging. | Shrinks the charging zone, restricting where you can fight while making progress. |
| Transcendence | Adds maximum health and converts all but one health into shields. | Changes your health setup rather than simply adding ordinary healing capacity. |
| Corpsebloom | Increases healing received. | Delivers healing over time with a per-second cap; it changes the response to sudden damage. |
| Light Flux Pauldron | Shortens skill cooldowns. | Reduces attack speed. |
| Stone Flux Pauldron | Raises maximum health. | Reduces movement speed. |
| Brittle Crown | Gives a chance to earn gold when hitting enemies. | Taking damage loses gold. |
| Longstanding Solitude | Grants free purchases on level-up. | Converts gold into experience and raises gold purchase costs. |
| Mercurial Rachis | Creates a damage-boosting ward. | Enemies as well as allies can benefit from the ward. |
| Defiant Gouge | Makes Shrine interactions summon enemies. | Adds another fight to those interactions; stronger stacks make that commitment larger. |
| Egocentrism | Generates orbiting explosive attacks. | Converts a random held item into another Egocentrism every 60 seconds. |
| Eulogy Zero | Gives generated items a chance to become Lunar pickups. | Changes the loot you would otherwise receive. |
| Neutronium Weight | Transfers its penalties to an enemy when you hit it. | Reduces combat stats while you carry it and can transfer again when the holder dies. |
| Beads of Fealty | Has a hidden purpose rather than a normal combat bonus. | Does not supply an ordinary damage, healing or movement improvement. |
Use Gesture when automatic equipment use is desirable, rather than assuming cooldown reduction always helps. An equipment effect that can hurt the team or that needs precise timing deserves a different decision.
Purity calls for the same check: skill uptime may improve while a chance-based damage package becomes less reliable. Light Flux Pauldron also makes you compare more frequent skill availability against slower attacks. These choices change how a build functions; they are not free upgrades.

Purity trades favorable luck for shorter skill cooldowns.
For Egocentrism, decide before picking it up whether you are willing to let it consume the inventory you have built. Removing the item later does not promise to restore the pickups already converted. The first question is whether you want the conversion at all, not whether its bombs deal useful damage.
The four Heresy items replace skills
Each Heresy item takes over one skill slot. Treat that as a replacement decision: identify the original skill you are losing before evaluating the new attack or escape tool.
| Heresy item | Replaced slot | New ability |
|---|---|---|
| Visions of Heresy | Primary | Hungering Gaze, which fires tracking shards with delayed detonations. |
| Hooks of Heresy | Secondary | Slicing Maelstrom, a charged projectile with an eventual explosion and root. |
| Strides of Heresy | Utility | Shadowfade, granting a period of intangibility, movement speed and healing. |
| Essence of Heresy | Special | Ruin, which accumulates stacks through damage and detonates them when activated. |
Hooks of Heresy's charge changes launch speed, not damage. Holding the input increases the projectile's initial velocity; a full charge releases automatically. For a nearby target, a short or uncharged cast can keep the projectile close instead of sending it past the intended area. Choose the charge for distance, not for an assumed damage bonus. The Hooks mechanics reference also notes that extra copies lengthen both the root and recharge time.
Taking Hooks gives up the Secondary you had equipped. Check the original skill's job before replacing it: a movement, setup or resource-management tool can matter more to your current survivor than another damaging projectile. Inspect Hooks in the database.
A Utility replacement is especially consequential if you rely on that slot to reposition. Shadowfade may offer a useful alternative, but taking it means giving up the movement or defensive action your survivor normally uses. You can evaluate an individual Heresy pickup on that basis without treating the other three as mandatory purchases.
Lunar equipment occupies the equipment slot
These pickups have blue rarity but use the active equipment slot. Choosing one therefore also means considering the equipment you would leave behind.
| Lunar equipment | Main effect | Key restriction |
|---|---|---|
| Effigy of Grief | Places a slowing, armor-reducing area. | Affects all characters inside, including your team. |
| Glowing Meteorite | Calls down a meteor storm. | Meteors damage allies and the user as well as enemies. |
| Helfire Tincture | Burns characters around the holder. | Includes self-damage and damage to nearby allies. |
| Spinel Tonic | Gives a temporary boost to multiple stats. | When it ends, there is a 20% chance of a stacking Tonic Affliction. |
| Totem of Sacrifice | Creates a temporary sacrifice altar and later produces rewards. | Enables friendly fire nearby and is consumed on use; requires Hallowed Concepts. |
A short cooldown does not make friendly-fire effects safe. Coordinate these equipment choices in co-op, especially before combining them with Gesture's automatic activation. Spinel Tonic also needs a plan for the time after its buff ends; do not treat a single activation as a permanent stat increase.
Removing an unwanted Lunar pickup
Lunar items cannot be scrapped. A Cleansing Pool can exchange a random held Lunar item, including Lunar equipment, for a Pearl or Irradiant Pearl. The documented outcomes are 80% Pearl and 20% Irradiant Pearl per exchange. Cleansing Pool rules.
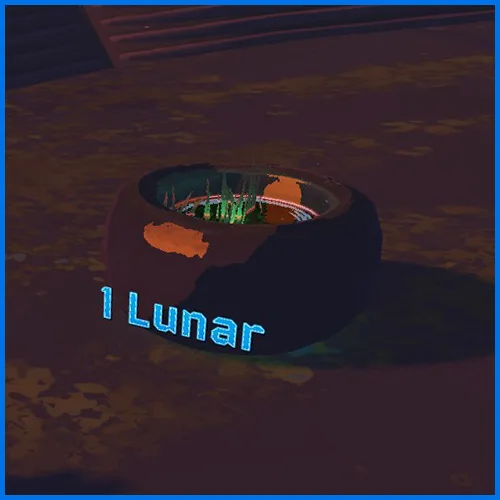
A Cleansing Pool exchanges a random held Lunar pickup for a Pearl or Irradiant Pearl.
The important limitation is random selection: a pool is not a menu for removing only the item you dislike. Carrying several Lunar pickups puts the useful ones into the same decision. Pools can appear in environments including Wetland Aspect, Scorched Acres and Siren's Call, with additional possibilities from newer content, but finding one is not guaranteed. They do not spawn with Artifact of Command active.
That makes skipping a harmful pickup a valid choice. Do not buy an item on the assumption that the next stage will provide a way to remove it.