Enter Risk of Rain 2 Artifact codes at the Compound Generator on Sky Meadow or Helminth Hatchery. Set the nine switches to the desired three-by-three pattern, then activate the adjacent laptop. A valid pattern opens an Artifact Portal to Bulwark's Ambry. Complete the trial and collect the Artifact to unlock it permanently; submitting the code by itself is only the entrance step.
Read every code as three rows, from top to bottom and left to right within each row. The available shapes are Square, Circle, Triangle, and Diamond. Rebirth has no code: its unlock uses Experienced Rebirth and the Shrine of Rebirth instead. Do not spend a run trying to create a Rebirth portal with a guessed pattern.
All coded Artifact patterns
Each cell below is one complete horizontal row of the nine-switch grid. Enter the first row first, verify it, and then continue with the second and third rows. The names describe the shapes rather than the order in which you should click an individual switch.
| Artifact | Top row | Middle row | Bottom row |
|---|---|---|---|
| Chaos | Circle, Triangle, Circle | Circle, Triangle, Circle | Circle, Triangle, Circle |
| Command | Square, Square, Square | Square, Square, Square | Triangle, Triangle, Triangle |
| Death | Circle, Circle, Circle | Square, Triangle, Square | Circle, Triangle, Circle |
| Delusion | Square, Circle, Square | Circle, Circle, Circle | Square, Triangle, Square |
| Devotion | Triangle, Diamond, Triangle | Square, Diamond, Square | Diamond, Triangle, Diamond |
| Dissonance | Circle, Square, Square | Square, Square, Square | Square, Square, Circle |
| Enigma | Diamond, Square, Square | Triangle, Square, Triangle | Circle, Diamond, Diamond |
| Evolution | Diamond, Diamond, Diamond | Square, Square, Square | Circle, Circle, Circle |
| Frailty | Circle, Circle, Circle | Triangle, Circle, Triangle | Triangle, Triangle, Triangle |
| Glass | Diamond, Diamond, Diamond | Diamond, Diamond, Diamond | Diamond, Diamond, Diamond |
| Honor | Square, Square, Square | Square, Triangle, Square | Square, Square, Square |
| Kin | Circle, Triangle, Triangle | Diamond, Circle, Triangle | Diamond, Diamond, Circle |
| Metamorphosis | Diamond, Square, Circle | Diamond, Square, Circle | Diamond, Square, Circle |
| Prestige | Triangle, Circle, Circle | Square, Circle, Triangle | Circle, Circle, Square |
| Sacrifice | Triangle, Triangle, Triangle | Triangle, Triangle, Triangle | Triangle, Diamond, Triangle |
| Soul | Circle, Square, Circle | Circle, Diamond, Circle | Square, Diamond, Square |
| Spite | Triangle, Circle, Triangle | Circle, Circle, Circle | Triangle, Circle, Triangle |
| Swarms | Circle, Circle, Triangle | Triangle, Diamond, Triangle | Triangle, Circle, Circle |
| Vengeance | Diamond, Square, Square | Diamond, Circle, Square | Diamond, Square, Square |
Several patterns look similar at a glance. Honor is mostly squares with one triangle in the center; Command uses two entire rows of squares and a bottom row of triangles. Sacrifice is mostly triangles with a diamond in the bottom center, while Glass uses diamonds in every position. Compare the whole row instead of searching only for a shape that stands out.
For Soul, use the exact rows shown here: Circle–Square–Circle, Circle–Diamond–Circle, then Square–Diamond–Square. Its central diamond and bottom-center diamond do not mean the entire outside ring is also diamonds. Copying a visually similar pattern from memory can send you back to checking all nine inputs.
Find the correct generator for your stage
Sky Meadow places the Compound Generator below its main terrain. It is a separate destination from the normal Teleporter, so inspect the lower part of the stage when the run's purpose is unlocking an Artifact. The generator is not randomly summoned by killing the Teleporter boss or activating a Shrine of the Mountain.
Helminth Hatchery offers another generator on the highest level. This stage belongs to Seekers of the Storm. Follow the Hatchery's own geography rather than applying a Sky Meadow route mechanically: the lower-level search appropriate to Sky Meadow is not the generator location here.
You can use a known code without first finding its hidden stone tablet during the run. The tablet is a clue to the pattern, and the generator checks the pattern entered on its switches. If your only goal is the unlock, route toward the generator with the code ready instead of making an unnecessary tour of distant clue locations.
Loot and prepare before taking the Artifact Portal. It transports you away from the stage, so remaining chests and unfinished exploration are not a task you can expect to complete immediately after entering. Your next challenge happens under the selected Artifact's rules, which makes a functional build more useful than rushing a fragile survivor through the portal just because you found the laptop.
Set the nine switches without losing orientation
Use a consistent viewpoint that makes the three rows clear. Stand where the grid and the laptop relationship are easy to recognize, then compare the table with what you see. If you walk around to the opposite side, the positions can appear reversed. Return to the original viewpoint before deciding that a code is wrong.
The shape cycle is Square → Circle → Triangle → Diamond, then back around. Watch the current shape change each time you interact. Do not rely on a memorized number of clicks when a switch may already have been changed by you or a teammate. The visible final shape is what matters.
A careful input sequence is:
- Choose the Artifact name and keep its three rows visible in your reference.
- Set the top-left, top-center, and top-right switches.
- Check that complete row before moving to the middle row.
- Set and verify the middle row in the same left-to-right order.
- Set and verify the bottom row.
- Read the entire grid one final time from the same viewpoint.
- Interact with the laptop to submit the finished pattern.
In a cooperative lobby, give one person responsibility for setting the pattern. Other players can read the reference and call out corrections, but simultaneous clicking makes it difficult to know which switch changed last. If the group is troubleshooting, freeze the inputs long enough to compare the actual nine shapes with the table.
A repeated-row pattern such as Metamorphosis is a useful demonstration of the layout: every row is Diamond, Square, Circle. The repetition is horizontal. Filling a vertical column with each shape because you mentally rotated the reference gives a different grid.
Finish the trial after opening the portal
The Artifact Portal is confirmation that the generator accepted a pattern. It is not the permanent unlock notification. The portal takes you to Bulwark's Ambry, where the Artifact Reliquary controls the trial. The selected Artifact becomes active there even if your profile has never unlocked it before.
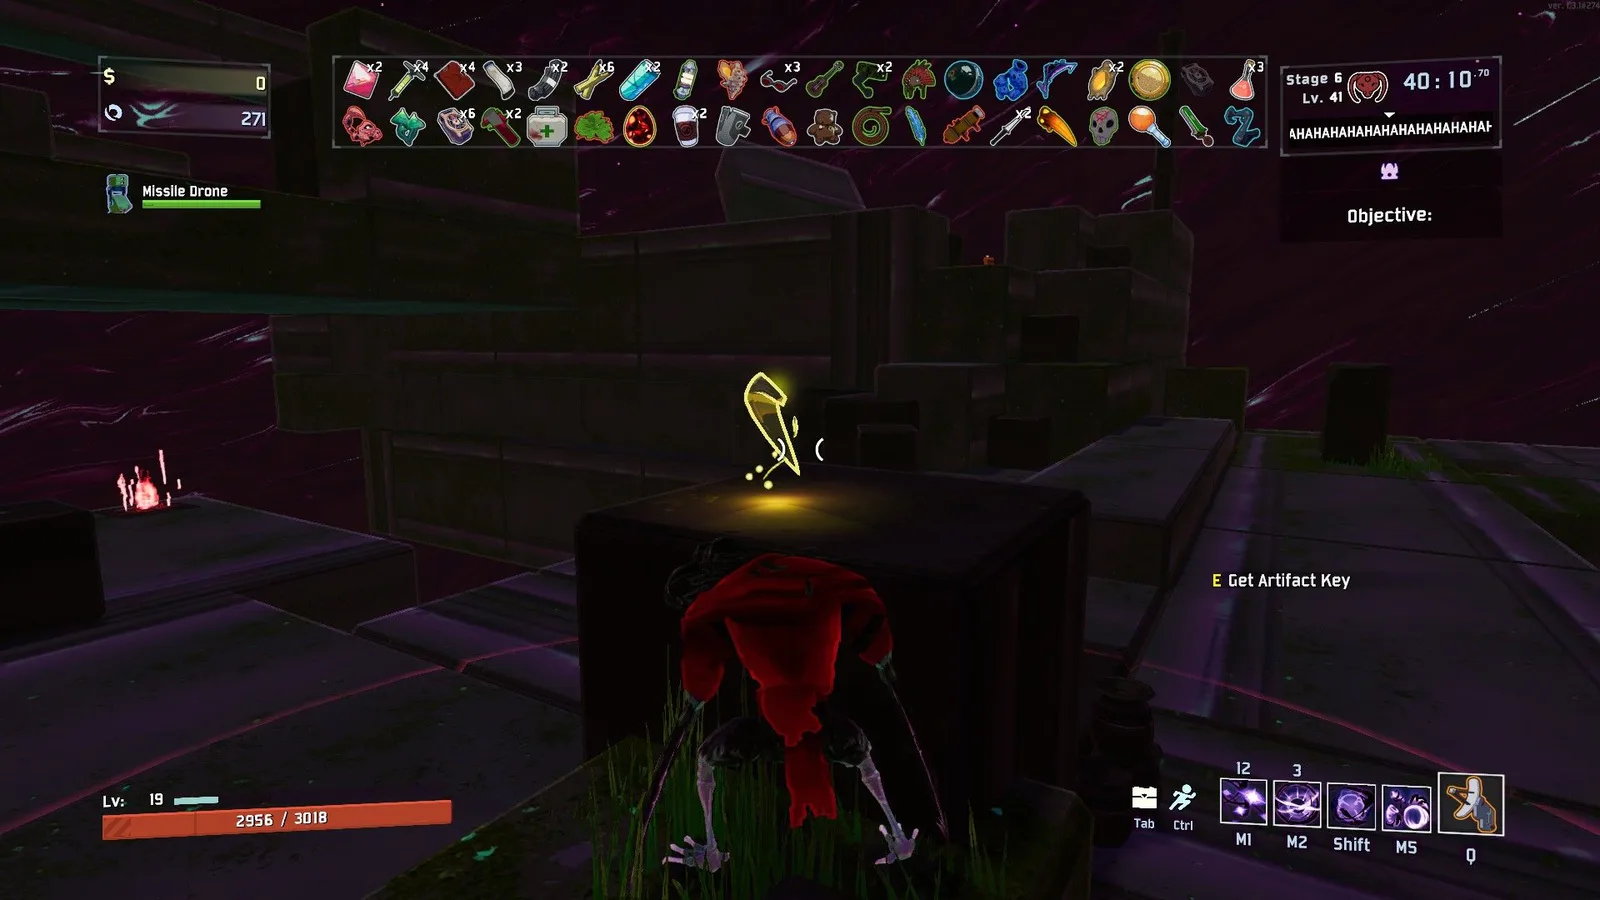
Collect the opening key before starting the Reliquary encounter.
Collect the starting Artifact Key from the elevated block in front of the Reliquary and use it at the central object. Monsters begin spawning. Defeat them, collect later Artifact Keys, and use the keys to advance the Reliquary encounter. After the Reliquary is destroyed, pick up the Artifact and leave through the exit portal.
A key interaction removes keys from all players' inventories. Avoid a plan based on teammates stockpiling several keys for later. The practical loop is one key, one return to the Reliquary, then another search among the defeated monsters' drops. If the arena remains quiet on arrival, check the opening key interaction before assuming the portal produced a broken trial.
Your existing run modifiers remain active too. If you entered with several Artifacts enabled, the trial is subject to that combination plus the Artifact being unlocked. You can make an unlock needlessly difficult by carrying rules that clash with the trial's new effect, so review the run setup as well as the code itself.
Choose a first code that supports your actual task
Command is a useful early choice when you want to practice a particular inventory. Its pattern is simple to verify: squares across both upper rows and triangles across the bottom. Its benefit applies to future runs when enabled, allowing item choices from the appropriate rarity rather than turning every drop into any item in the game.
Do not choose Glass merely because nine identical shapes are easy to enter. The trial applies Glass's 500% ally damage and 10% health rule, and one-shot protection is disabled. The input is simple; the combat condition is demanding. Make the choice based on the rules you can survive, not on which grid is fastest to click.
Frailty likewise changes how you move rather than simply how you fight. It makes fall damage doubled and lethal. If you are learning the Ambry's separated platforms, account for that rule before committing to a jump. Chaos enables friendly fire, while Honor makes enemies elites. Each code leads to a distinct practical challenge even though the generator procedure is identical.
Prestige requires special preparation for its trial. Reliquary key interactions spawn bosses, and defeating the spawned boss provides an additional key at the original key location. Its run effect also keeps Mountain Shrine effects across stages. Treat it as an escalating boss modifier rather than assuming every coded trial has the same monster-wave rhythm.
Resolve failed inputs and missing rewards separately
If no Artifact Portal appears, inspect the submitted grid first. Check the top and bottom rows, then shapes that are easy to mix up at a distance. Verify that you activated the laptop after setting the final switch. A nearly complete grid left unsubmitted does not open the portal on its own.
If a portal appears but you do not have the Artifact afterward, look at the trial's completion state. Dying inside the Ambry, leaving without collecting the exposed reward, or mistaking a key pickup for the unlock are different from entering the wrong code. Fix the relevant step rather than replacing a pattern the generator already accepted.
After an unlock, enable the Artifact in the lobby before the run where you want to use it. A successful unlock adds an option; it does not mean every later run silently uses that modifier. Multiplayer lobbies pool unlocked Artifacts from their players, so seeing an available modifier can also reflect a teammate's profile. Keep personal unlock progress separate from the options a particular group can select.
Handle Rebirth without a generator pattern
Rebirth is the exception to this code table. Its route uses the Shrine of Rebirth at the end of Prime Meridian and the Experienced Rebirth challenge. A second interaction with the shrine offers an item from your current inventory and ends the run. That deposit can become the starting gift for the next run where you enable Rebirth.
A gift is used once, and a later deposit replaces the earlier one. If no gift is stored, the Artifact supplies a random common item instead. Void items, Lunar items, and equipment cannot be deposited. This reward system is separate from the nine-switch generator, so an empty entry for Rebirth is intentional rather than a missing code you need to discover.