A strong Risk of Rain 2 Loader build combines movement, high-damage hits, and enough defense to keep repeating the grapple-and-punch cycle. Prioritize useful movement speed, Focus Crystal, Crowbar, and Kjaro's or Runald's Band when they are available. Charged Gauntlet is the default foundation because its Heavy property rewards velocity and its piercing hit can damage several enemies on the same line.
Build around the punch you can land consistently. Grapple momentum raises its value, but a fast swing that misses the target is less useful than a controlled approach. Loader's fall-damage immunity and Scrap Barrier make her forgiving in some situations; neither prevents other attacks from killing her or makes every landing position safe.
Choose a practical loadout for the momentum build
Keep Charged Gauntlet when you want a charged, piercing punch that benefits from lining enemies up. You can begin charging while attached with Grapple Fist or Spiked Fist, so the preparation happens during movement rather than only after you arrive at the enemy.
Thunder Gauntlet is an alternative when you prefer a much shorter charge and a single-target impact followed by a lightning cone. Its interaction with groups differs from Charged Gauntlet: the punch does not pierce through every enemy on the line, and the cone's damage does not receive the same Heavy velocity bonus as the main hit. Decide from the way you approach targets rather than treating the alternatives as identical punches with different numbers.
Grapple Fist attaches to a target or terrain and deals no damage. Spiked Fist adds damage and a stun, pulls you toward heavy targets, and pulls light targets toward you. That distinction changes the approach. A small enemy is not always the stable anchor you expected when using Spiked Fist, so aim at terrain or a heavy target when you need a predictable swing.
M551 Pylon provides nearby zaps and an aerial grapple anchor. Thunderslam gives you a downward impact attack instead. Pylon is useful when you want more movement options or coverage against nearby targets; Thunderslam fits an approach that turns aerial positioning into another attack. Choose the special you can integrate into your route without losing control of the next punch.
Make movement items work before chasing damage totals
Paul's Goat Hoof is a useful movement pickup because velocity is part of Loader's damage setup as well as her travel. More movement gives you room to build momentum, leave a dangerous position, and cross the map between objectives. Its practical value is larger when your swings and punches already connect reliably.
Movement speed does not replace aim or timing. After a significant speed upgrade, check how the swing behaves before committing to an important target. A grapple that used to line up neatly can now carry you farther across the arena. Adjust the release point and keep a usable recovery route instead of maintaining the same timing by habit.
Backup Magazine provides another secondary charge. For Loader, that means another grapple opportunity, which can be used for approach, correction, or escape. Keeping a spare charge is particularly useful when a punch leaves you in an awkward place or the first anchor no longer gives a safe route.
Hopoo Feather and other movement support can also make navigation more forgiving when available. Assess what the item changes in your route: a second chance to steer in the air may be more useful than a marginal damage upgrade if your deaths come from arriving at the wrong side of an enemy group.
Use Focus Crystal and Crowbar for the opening hit
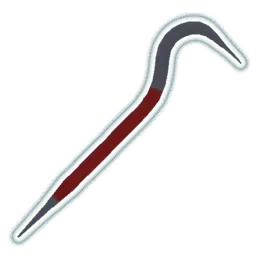
Focus Crystal improves damage against nearby enemies. Loader naturally spends much of her attack time close to her targets, so it supports the range where a gauntlet hit lands. Its value still depends on distance: throwing a Pylon and remaining far from the target is not the same condition as making a close-range punch.
Crowbar rewards hits against enemies above its health threshold. Loader's large opening attack is a good way to use that bonus before the target has been worn down. Decide which hit should be the opener, especially when small attacks or environmental damage could remove the target from that condition before the punch arrives.
The two items solve different parts of the same attack. Focus Crystal supports proximity; Crowbar supports a fresh target. Keep those conditions in mind rather than imagining that every punch receives both bonuses equally throughout a boss fight. Against a damaged boss, continue the movement-and-punch cycle without expecting Crowbar to behave like unconditional damage.
Do not delay every attack while waiting for an ideal theoretical combination. A supported punch that lands promptly is useful, and ordinary loot may never provide the exact item list you wanted. These are priorities for choices you actually receive, not prerequisites for playing Loader successfully.
Trigger the Bands with a suitable gauntlet hit
Kjaro's Band and Runald's Band respond to qualifying high-damage hits and then recharge. Loader's powerful utility punches make them natural partners. Use a large gauntlet hit when the Bands are ready, and plan the next approach around both the skill and item cooldowns rather than assuming every attack produces another Band effect.
Kjaro's Band adds a damaging flame effect, while Runald's Band adds an ice blast and slow. Both can contribute to the same qualifying hit. They support burst damage particularly well because the triggering attack is already a large part of Loader's kit.
Do not assume every skill clears the trigger condition. Spiked Fist's stated hit damage is below the Bands' more-than-400% trigger threshold by itself. The charged utility is the reliable centerpiece of the Band plan. This distinction matters if you grapple directly to a target, see no Band effect, and incorrectly conclude that the items are broken.
Likewise, the Bands' activation is not a random chance you can fix with Luck. Their damage threshold and recharge condition are what determine whether the effect is available. Evaluate Luck items for appropriate chance-based effects elsewhere in the inventory instead of buying them solely to make these deterministic triggers happen more often.
Perform the grapple-and-punch sequence in a controlled order
Start with a target and an anchor, rather than grappling somewhere and deciding what to hit afterward. A stable terrain anchor lets you build movement while preserving a clear line toward the enemy. A heavy target can serve a different kind of direct approach, depending on the secondary you selected.
- Identify the enemy you want the utility punch to hit.
- Find terrain or a suitable target that gives a controlled grapple route.
- Attach and begin charging Charged Gauntlet during the movement.
- Steer the swing so your travel line passes through the intended enemy.
- Release the punch while carrying useful momentum.
- Continue through to a safe recovery position.
- Reassess the grapple charge, utility cooldown, and nearby enemies before repeating.
A successful hit is only part of the sequence. The destination determines whether you can make the next attack safely. Avoid a punch line that deposits you in the middle of several enemies with no secondary charge left to leave. Planning the recovery is especially important when your first hit does not kill the target.
Charged Gauntlet can pierce, so a line through several enemies can provide more value than punching one isolated target. Do not bend the route into an unsafe approach solely to catch one extra monster. Prioritize a line you can repeat and recover from, then take group alignment opportunities when the battlefield offers them.
Understand what actually produces Scrap Barrier
Scrap Barrier provides temporary barrier from the relevant gauntlet hits. Knuckleboom, Charged Gauntlet, and Thunder Gauntlet can support that defense. M551 Pylon and Thunderslam do not provide the same passive interaction. A build that mostly throws the Pylon cannot assume it is continuously generating barrier merely because damage is appearing on the screen.
Knuckleboom is useful between utility attacks when it is safe to stay close. Soldier's Syringe can help you attack faster and build barrier through those hits. Smaller enemies may be knocked out of reach, however, so more attack speed does not always translate into uninterrupted melee contact against every target.
Barrier is temporary protection, not healing restored to your ordinary health pool. Continue avoiding attacks even when the extra bar is large. If the current enemy mix makes sustained melee unsafe, return to the grapple-and-punch plan instead of forcing primary attacks just to keep the passive active.
Fall-damage immunity also has a precise role. It allows Loader to take drops that would injure other survivors, including under the Artifact of Frailty. It does not make the place where she lands safe from enemies, explosions, or other hazards. Use it to expand your route options while keeping the destination under consideration.
Evaluate rare items by the attack they improve
Hardlight Afterburner adds utility charges and reduces the utility cooldown. Loader's utility is both a major attack and a movement tool, so this item can improve the frequency of useful punches and provide another recovery option. Additional charges are most valuable when you spend them on deliberate routes rather than several uncontrolled dashes in a row.
H3AD-5T v2 supports a height-based landing attack. Loader can reach significant height with her grapple, making the pairing practical. Plan the landing position and the next movement rather than treating every high jump as automatic maximum damage. The item also has its own recharge behavior, so check whether the effect is available for the attack you are planning.
Bandolier can reset skill cooldowns through ammunition pickups. Loader's movement through a target area may put those drops within reach, but the pickup still has to be collected. Use a reset to restore your sequence when convenient; do not turn every distant pack into a dangerous detour.
Area and proc items remain useful when the core punch already works. Ukulele can spread a large hit's contribution through nearby targets. These effects supplement the inventory rather than changing the need to aim and land the original attack. If you are missing enemies, the first correction is mechanical control, not another theoretical proc chain.
Diagnose the build from the failure you are seeing
If bosses take too long to die, check whether you are landing charged punches and triggering ready Bands. If you deal strong damage but keep dying after impact, inspect your recovery position and reserve grapple charge. If small enemies stay alive while you chase a boss, use group lines or your special to cover the threats that the single target route leaves behind.
A stationary description of Loader as a slow bruiser misses how much movement her grapple enables. Her effective build uses that movement for access, damage, and retreat. Improve one repeatable swing-and-punch route first, then add speed and damage that strengthen it. The inventory becomes more reliable when each upgrade supports a sequence you can execute across different stage layouts and enemy groups.