
The Risk of Rain 2 Gold Portal normally opens after you pay an Altar of Gold and complete that stage's Teleporter Event. It leads to Gilded Coast, where seven Halcyon Beacons control the fight against Aurelionite. Activate all seven to make the boss vulnerable; activating only four summons it without removing its protection.
The encounter rewards one Halcyon Seed per player and opens a Gold Portal exit. Time and difficulty progression pause in Gilded Coast, but the fight still has a damage window: if Aurelionite survives it, the beacons deactivate and must be purchased again. Budget for the entire beacon circuit before committing to the fight.
Open the Gold Portal on a regular stage
The standard route begins with the Altar of Gold, a paid interactable. Find it, pay its displayed cost, then successfully finish the Teleporter Event on the same stage. After the event, choose the Gold Portal to travel to Gilded Coast.
Paying the altar and entering the portal are separate steps. The purchase establishes the route; it does not immediately move you into the hidden realm. You still need to finish the stage's Teleporter Event and select the resulting entrance. Before leaving the completed teleporter area, check that you are taking the Gold Portal rather than advancing through another available exit.
A practical order is to pay the altar before beginning the Teleporter Event. That makes the purchase a deliberate part of the stage plan, rather than something you remember after finishing the event. In multiplayer, announce the detour before the group advances so everyone knows that Gilded Coast is the next destination.
The Altar of Gold is different from a Halcyon Shrine. Both can be involved in gold-colored routes, but the ordinary altar route does not require the Seekers of the Storm conditions described below. Identify the interactable by its name and follow the matching route instead of assuming every golden shrine uses the same rules.

Recognize the alternative entrances
| Entrance | Requirement | Result |
|---|---|---|
| Altar of Gold | Pay the altar, then finish the stage's Teleporter Event | Gold Portal to Gilded Coast |
| Lunar Seer | A rare Seer destination showing Gilded Coast | An alternative route into the realm |
| Halcyon Shrine with Seekers of the Storm | Prime Meridian has already been completed during this run, then charge the shrine | Gold Portal instead of the shrine's Green Portal |
The Lunar Seer option is a rare opportunity, not a destination you should assume will be available on every Bazaar visit. If you are choosing a route before a run, the normal altar sequence is the basic mechanism to understand. If a Seer does show Gilded Coast, recognize it as another entrance to the same encounter.
The Halcyon Shrine exception depends on this run's progress. Completing Prime Meridian in a previous run does not satisfy the wording of that condition. With Seekers of the Storm enabled and Prime Meridian already completed in the current run, charging the shrine produces Gold rather than Green. An unexpected portal color can therefore reflect your route history instead of a failed shrine interaction.
If your current goal is the Path of the Colossus, check which route you have actually opened. The Bazaar's “You hear thunder rumbling” secret is another Green Portal mechanism, with its own prerequisites and three destructible geodes. It should not be confused with purchasing an Altar of Gold or charging a Halcyon Shrine.
Prepare for the seven-beacon encounter
Gilded Coast contains seven Halcyon Beacons. Each has a base price of 25 gold, with the cost scaling according to difficulty. Use the amount displayed in your run when planning the circuit. The base figure explains the mechanic; it is not a promise that every beacon will cost exactly 25 by the time you arrive.
Time and difficulty progression pause inside the realm. That gives you room to locate the beacons and understand the layout without the normal timer continuing to push difficulty upward. It does not make the enemies harmless or remove the need to finish the boss encounter.
Before you activate the fourth beacon, identify where the remaining beacons are. The fourth purchase summons Aurelionite, so losing track of the remaining three creates a fight in which the boss is present but still cannot be damaged. Saving enough gold for all seven purchases makes the transition from summoning to vulnerability easier to manage.
In a group, divide the search by landmarks and agree who is covering the last unlit beacons. That is a coordination recommendation rather than a separate mechanic: the game checks whether all seven are active. Several players repeatedly visiting the same lit beacon will not compensate for one unlit beacon elsewhere.
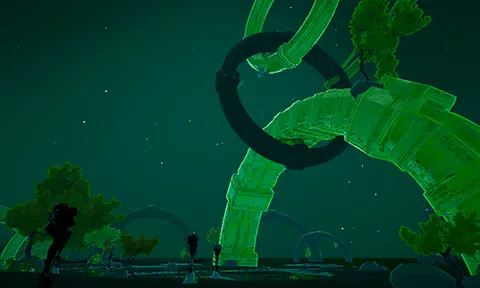
Activate all seven before attacking Aurelionite
The beacon sequence has two important thresholds:
- Fourth active beacon: Aurelionite appears.
- Seventh active beacon: With every beacon active, its invulnerability ends and the damage window begins.
Aurelionite being visible is not the signal to stop buying beacons. If you have only activated four, five, or six, continue the circuit. Spending that time attacking an invulnerable boss delays the action that actually allows damage.
Once all seven are active, switch your attention to the boss. The damage window is limited. If Aurelionite survives, the beacons turn off and you need to purchase them again. A second circuit is part of the encounter's rules; it does not mean the portal failed or that you permanently lost the fight after the first window.
| Encounter state | Useful next action |
|---|---|
| Fewer than four beacons are active | Continue gathering the needed gold and activating beacons |
| Aurelionite has spawned but is invulnerable | Find and activate the remaining unlit beacons |
| All seven beacons are active | Use the damage window to attack Aurelionite |
| The window ends with the boss alive | Prepare another purchase circuit |
| Aurelionite is defeated | Collect the reward and inspect the available exits |
This is why checking your funds before the fourth activation helps. It reduces the chance that you summon the boss while still needing a long search for money or a missing beacon. It also gives the party a clear moment to prepare: finish the circuit first, then concentrate damage during vulnerability.
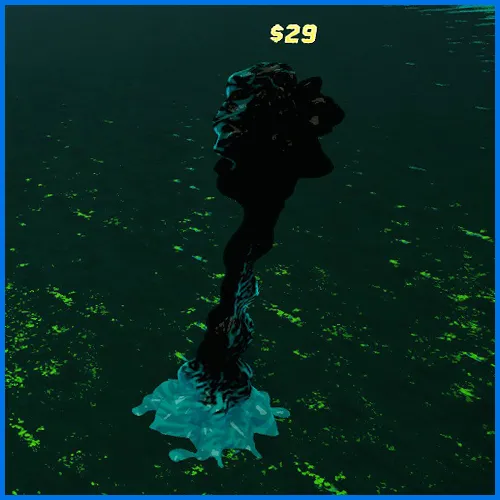
Collect the four guaranteed small chests
Gilded Coast has four guaranteed small chests. The landmarks are more useful than a vague instruction to search the shoreline:
| Chest | Landmark to check |
|---|---|
| First | One end of the half-buried ring |
| Second | The other end of the half-buried ring |
| Third | In the water behind a tree |
| Fourth | Behind a fallen statue |
Treat the two ring ends as two separate checks. After finding one, move to the other end rather than assuming that the ring has only a single chest. Then check the tree in the water and the fallen statue. This gives you a short completion list you can use before leaving the realm.
“Guaranteed” describes their presence, not a claim that every interaction is free. Plan your purchases using the actual prices visible in your run. If you are still preparing the beacon circuit, keep that expenditure in mind before spending the money you intended to use for the remaining beacons.
The paused progression gives you an opportunity to make these checks deliberately. You can search the landmarks without the usual difficulty timer advancing, but keep track of the encounter state and any enemies still present. In multiplayer, call out which chest landmarks have been checked so the party does not repeatedly inspect the same end of the ring.
Take the Halcyon Seed and choose the exit
Defeating Aurelionite awards one Halcyon Seed per player and produces a Gold Portal exit. The Halcyon Seed lets Aurelionite fight as an ally during later Teleporter Events. It is the encounter's boss-item reward, separate from the four small chests around the map.
With Seekers of the Storm enabled, a Green Portal can also offer a continuation toward the Path of the Colossus. Look at the exits before selecting one. If you are following a planned DLC route, the presence of the ordinary Gold Portal exit does not mean it is the only relevant choice.
For a party, finish reward collection and chest checks before using an exit. The useful order is boss reward, remaining map objectives, route choice, then departure. That order prevents the common practical problem of one player leaving while another is still checking the tree or statue chest.
Gilded Coast is a detour with a boss encounter and loot, whereas the Celestial Portal leads to the Obelisk and a potential ending. Choosing Gold does not perform the Celestial route's obliteration. Keep the destination name and objective together when comparing multiple portal options during a long run.
Troubleshoot the Gold Portal route
If the portal has not appeared, first separate the entrance conditions from the boss mechanics. On a regular stage, confirm that you paid an Altar of Gold and finished that stage's Teleporter Event. Inside Gilded Coast, a visible but invulnerable Aurelionite points to the beacon state, not an entrance problem.
If the beacons have gone dark again, the damage window ended before the boss died. Purchase them again to reopen vulnerability. If a Halcyon Shrine produced Gold when you expected Green, check whether Prime Meridian was already completed in the current run with Seekers of the Storm enabled.
For repeat visits, the reliable checklist is short: pay the correct altar, complete the event, enter Gold, locate seven beacons, fund the full circuit, use the damage window, collect the Seed, check four chest landmarks, and select the exit that matches your route.